Mailchimp is an email marketing tool that offers a wide range of features to help businesses and individuals connect with their audience effectively. One of the most important features of Mailchimp is the ability to segment and tag your email list. Segmentation and tagging allow you to organize your subscribers into groups based on their interests, behaviors, and other attributes, making it easier to send targeted and personalized emails to specific groups.
Although there are many blog posts about this topic on the internet, in this most comprehensive and detailed blog post on Mailchimp segments vs tags, we will discuss the differences between Mailchimp segments and tags, their benefits and drawbacks, and how to use them effectively to improve your email marketing campaigns.
Mailchimp Tags
Mailchimp Tags are labels that you can add to individual subscribers in your email list to help you organize and group them based on specific criteria. For example, you can add a new tag to subscribers who have purchased a certain product or who have shown interest in a particular topic.
Tags are flexible and allow you to segment your Mailchimp list based on specific behaviors or interests that may not fit into broader categories. With tags, you can create dynamic segments that update automatically as subscribers interact with your emails or website. For example, If you create a landing page with a sign-up form to collect new subscribers, you can tag contacts who sign up through that page.
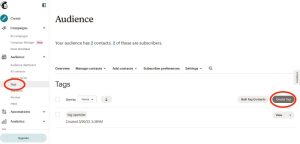
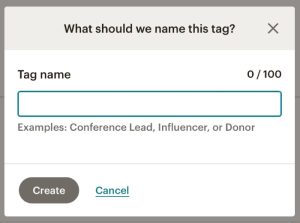
To create tags in Mailchimp, you can use the Tags section under the Audience tab in your Mailchimp account. From there, you can add new tags and assign them to individual subscribers or groups of subscribers using a bulk upload. You can also use Mailchimp’s automation features to automatically add or remove tags based on subscriber actions.
While tags can be a powerful tool for segmenting your email list, they do have some limitations. For example, managing a large number of tags can become time-consuming, and it can be difficult to keep track of specific tags you have created and which subscribers have been assigned to each tag. Additionally, since tags are applied at the subscriber level, they may not be as useful for creating broader segments based on demographics or other attributes.
Mailchimp Segments
Mailchimp Segments are one of the best ways to organize your audience in Mailchimp besides Tags. While Tags are used to label subscribers based on their interests, behaviors, or preferences, Segments allow you to group subscribers based on specific criteria. Segments are dynamic and can change as subscribers meet or fail to meet the set criteria. In other words, as your subscribers’ behaviors or preferences change, they will be added or removed from the segment accordingly.
Segments are particularly useful for targeting specific groups of subscribers with tailored messages. For instance, if you have an upcoming sale event that is only applicable to your UK-based subscribers, you can create a new segment for all subscribers who have a UK-based address. You can then send targeted messaging to that group of subscribers who would be the right people to target without bothering those who are not eligible for the sale. This will greatly boost your email campaign’s open rate, click rate and conversion rate.
Segments can be based on various criteria such as geographic location, how many email campaigns a subscriber has opened, contacts who clicked on a link from your last email campaign, by purchase history and more. Mailchimp provides a wide range of pre-built segments to choose from, and you can also create custom segments tailored to your specific needs to target specific contacts in your mailing list.
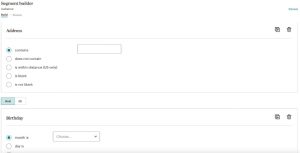
One advantage of Segments is that they allow you to create more targeted and personalized campaigns. By sending specific messages to a group of contacts who fit a certain criteria, you can increase the relevance and effectiveness of your campaigns which will boost your email campaign’s open rate and click rate. Each segment can contain up-to 5 conditions. When creating a segment, you will be able to choose whether the segment needs to meet all or any of the conditions. Additionally, you can monitor the performance of each segment to determine the effectiveness of your targeting strategies and make necessary adjustments.
How to create segments in Mailchimp
- Log in to your Mailchimp account and navigate to the Audience tab.
- Select the audience you want to work with, or create a new audience if necessary.
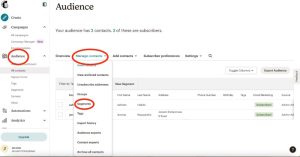
- Click on the Manage Contacts drop-down menu and select “Segments.”
- Click the “Create Segment” button to begin creating a new segment.
- Choose the criteria that you want to use to define your segment. Mailchimp offers a wide range of options, including contact information, subscriber activity, and more For example, you can create a segment based on subscriber location, purchase history, engagement level or even using a merge tag you created
- Set the conditions for your segment. Depending on the criteria you selected, you may be prompted to set specific conditions. For example, if you are segmenting based on engagement level, you might set a condition that includes subscribers who have opened or clicked on a certain number of emails.
- Make sure to give your segment a clear and descriptive name that will help you identify it later. Click on Review Segment where you will be able to see the number of contacts in your segment. Then click save Segment.
- Once you’ve created your segment, you can use it to send targeted campaigns to specific groups of subscribers. You can also edit your segment criteria at any time to refine your targeting.
Comparison of Mailchimp Segments vs Tags
Mailchimp offers two powerful tools for organizing and managing your email list: tags and segments. While both are used for categorizing subscribers, they have different functionalities and are used for different purposes.
Tags in Mailchimp are like labels that you can assign to your Mailchimp subscribers. They are customizable and you can add multiple tags to a subscriber, depending on their interests, behaviors, or other characteristics. For example, you can tag subscribers who are interested in a particular product, those who have purchased from your website, or those who have attended an event. Tags are great for tracking subscriber activities and personalizing your email campaigns.
On the other hand, segments in Mailchimp are subsets of your email list based on specific criteria or conditions. Segments are created by setting rules that identify Mailchimp subscribers who meet certain criteria, such as location, age, or purchase history. For example, you can create a segment of subscribers who live in a particular city, those who opened your last email, or those who have spent a certain amount on your products. Customer segments are useful to be able to manage contacts and for sending targeted and relevant emails to specific groups of subscribers.
When it comes to Mailchimp segments vs tags, there are a few key differences to consider. Firstly, segments are more dynamic than tags. Segments are updated automatically based on the rules you set, whereas tags need to be manually updated whenever you want to make changes. This means that segments are better for targeting campaigns to specific groups of subscribers in real-time, while tags are better for tracking subscriber behavior over time.
Another difference is that segments are more flexible than tags. With segments, you can use multiple criteria to define your target mailchimp audience, whereas with tags, you can only assign a single label to a subscriber. This makes segments ideal for complex campaigns that require multiple levels of targeting.
In terms of personalization, both segments and tags can be used to create more personalized email campaigns. Segments allow you to send targeted promotional emails to subscribers based on their specific interests or behaviors, while tags allow you to personalize your emails with dynamic content that changes depending on the subscriber’s behavior or other attributes.
Overall, the choice between Mailchimp segments vs tags depends on your specific email marketing needs. If you want to create more targeted campaigns for specific groups of subscribers, then segments are the way to go. If you want to track subscriber behavior and use that data to personalize your emails, then tags are a better option.
Best Practices for Using Mailchimp Segments and Tags
Now that you understand the differences between Mailchimp segments and tags, it’s important to understand how to use them effectively. Here are some best practices for using Mailchimp segments and tags:
- Define your goals: Before you start using segments and tags in Mailchimp, it’s important to define your goals. What do you want to achieve with your email campaigns? Are you looking to increase sales, generate leads, or improve engagement? Once you define your goals, you can create segments and tags that will help you achieve them.
- Keep your list clean: It’s important to keep your list clean by regularly removing inactive or bounced email addresses. This will help improve the deliverability of your emails and ensure that you are not wasting resources on inactive subscribers.
- Use tags for personalization: Tags are a great way to personalize your emails. You can use tags to add information such as a subscriber’s first name or location to your email templates, making them more relevant and engaging.
- Use segments for targeting: Segments allow you to target specific groups of subscribers based on their behavior or characteristics. You can create segments based on a variety of factors such as purchase history, engagement level, or location. This allows you to send more targeted and relevant emails to your subscribers.
- Test and measure: It’s important to test and measure the effectiveness of your segments and tags. Monitor your open rates, click-through rates, and conversion rates to see how your campaigns are performing. Use this information to refine your segments and tags and improve the effectiveness of your email campaigns.
- Automate where possible: Mailchimp offers a variety of automation features that can help you save time and improve the effectiveness of your campaigns. Use automation to send targeted emails to subscribers who meet specific criteria, such as abandoning a shopping cart or completing a purchase.
- Keep it simple: Finally, keep it simple. Don’t overcomplicate your segments and tags by creating too many or using too many criteria. Focus on creating segments and tags that are simple and easy to understand, and that help you achieve your goals.
By following these best practices, you can effectively use Mailchimp segments and tags to improve the effectiveness of your email campaigns and achieve your marketing goals.
Conclusion
In conclusion, both Mailchimp segments and tags are powerful tools for organizing your email list and targeting your email campaigns. Tags are more flexible and allow you to categorize your subscribers based on a wide range of criteria. Segments, on the other hand, are more powerful for creating complex subsets of your list based on multiple criteria.
When deciding which to use, it’s important to consider your goals and the complexity of your campaigns. If you have a large and diverse list, tags may be a better option for quickly and easily categorizing subscribers. If you have a more specific campaign in mind or want to create highly targeted messages, segments may be the way to go.
No matter which you choose, it’s important to follow best practices for using Mailchimp segments and tags. This includes keeping your list clean and organized, regularly reviewing and updating your segments and tags, and using them strategically to personalize and target your campaigns.
By following these best practices and utilizing the full potential of Mailchimp segments and tags, you can create more effective and engaging email campaigns that will help you achieve your marketing goals.



Recent Comments